Feeds:
Posts
Comments

Archive for August, 2011

Every morning during the week I follow a similar routine.  I wake up, take a shower, and proceed to either make a quick breakfast or if I’m working from home I can get a little fancier.  What used to be the fun part of this sometimes mundane start was deciding what to eat.  Should I do an eggo – with powdered sugar or syrup?  How about a veggie sausage patty with an over easy egg on an english muffin?  No?  Maybe some oatmeal with bananas and cinnamon.

Well, since being on Paleo these days, most of the things I just listed are off limits…I still splurge with them on weekends, but during the workweek, they are a no-no.  So I have to find new ways to shake it up.  You can’t just have an egg with cheese on it every morning for breakfast, right?  You’ve probably seen my flour-less muffin recipe but I just found a new kind of muffin to keep things interesting.


Clearly, these are not your traditional muffins (like any of mine really are?).  I’ll admit, I stumbled across this little gem of a recipe on My Retro Kitchen.  These muffins are just egg, meat, veggies, and some cottage cheese…if you please.  Give them a shot, you may just like them as much as me!


Makes 12 muffins

11-12 Eggs (I only ended up needing 11, but the original recipe calls for 12)

1/2 lb turkey sausage (or I used 4 pre-cooked turkey sausage patties for speed)

3 green onions, chopped (I used greens only, but you can use both if you want)

1/2 cup cottage cheese

4 oz can diced green chiles

1/2 cup broccoli, steamed and chopped


Preheat oven to 375.

Grease 12 muffin tins.  Layer into each muffin tin a little broccoli, green onions, sausage, cottage cheese, and green chiles.  The muffin tins should be pretty full.

In a bowl with a spout (I used a large measuring cup), beat the eggs with a whisk and sprinkle in a little salt and pepper to taste.  Pour the egg mixture over top of the veggies, sausage, and cheese (if using).

Pop them in the oven and let them cook for about 25 minutes (they will puff up a little and just start to get a little golden on top).  I threw a little cheddar on top, but it was totally unnecessary.  Now I just throw them in the microwave in the morning and voila – breakfast for a week!

Read Full Post »

I know, I know, it’s been a long time since I have posted anything.  I’ve been busy traveling and having company and a lot has happened that has kept me away from cooking for a while (or at least finding time to write about any interesting recipes).  But fear not, I have been sticking mostly to my Paleo diet and feeling great.  There has been a good deal of cheating on the weekend, but I try to minimize it as much as possible by finding ways to tweak recipes to make them fit my diet better.

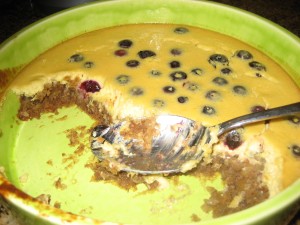
Weekend before last, we went over to a CrossFit reopening event where everyone brought something that was as close to Paleo as possible.  One of the recipes that came along were these delicious lemon bars with a crust that was somehow slightly crumbly and slightly chewy, a perfect combination with the lemon curd topping.  Of course I had to try this myself.

Crust before going in the oven

Crust after coming out of the oven

After looking through a variety of recipes, I landed on a couple different ones that I combined and altered a bit to make my own.  For the crust, I followed this lemon bar recipe and for the filling I most closely followed this recipe (props to her for the creative and hilarious name of the website).  Clearly, if you look at the recipe for the filling, I decided to add a little dairy into my Paleo dessert.  I am lucky enough that dairy doesn’t affect me to strongly, so while I still use it in moderation, I do occasionally pop it into recipes – typically via cheese.

The flavor of the filling of this was great and the hint of almond from the almond extra was perfect.  I think you could cut the crust recipe in half and have a much thinner crust based on preference.

**As a side note, I found (by accident) that if you bake the crust, let it cool, then pour in the filling, you can put in the fridge and bake it off at a later time if necessary.  Just be sure to let the baking dish come back to room temp after taking out of the fridge before putting it into a hot oven if using a fragile dish like the one I used.  I also think a little cinnamon in the crust would be fantastic, but haven’t tried it yet so didn’t want to post it.
Crust:
2 cups nuts (I used 1 cup almonds, 1/2 cup macadamia nuts, 1/4 cup walnuts, 1/4 cup pecans)
2 eggs
1/4 cup grapeseed oil (I’ve also heard that coconut oil works well)
1/4 cup honey
1 tsp salt
Filling:
8 oz (1 package) reduced fat cream cheese, softened
1/3 c honey
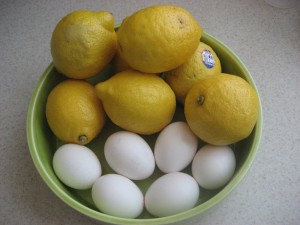
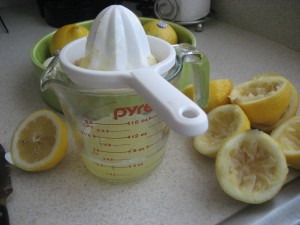
3 tbsp lemon juice
Zest of 2 lemons
1 teaspoon almond extract
2 large eggs
1/2 pint blueberries (fresh or frozen is fine)
For the crust:
Preheat oven to 450 degrees F.  Process nuts in food processor until ground, but not too finely, I like a few bigger chunks.  Combine nuts, eggs, honey, oil, salt and pour into a greased round pie dish (I used a 12 inch diameter deep dish pie dish).  Bake for 15-18 minutes or until a toothpick inserted comes out clean.  Set aside to cool.
For the filling:
Preheat oven to 350 degrees F.  Using a hand mixer, blend all ingredients until smooth and creamy.  Pour on top of crust and sprinkle the blueberries over top.  Bake for 25 -35 minutes or until top is just starting to get golden around the edges.

Read Full Post »