Feeds:
Posts
Comments

Posts Tagged ‘Gluten Free’

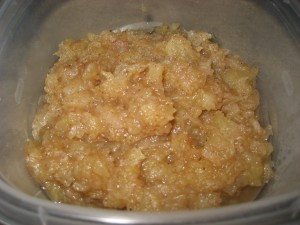
After discovering the Oatmeal Replacement, which consists mainly of applesauce, I decided that it was time for me to try to make my own applesauce.  As you probably know, there are a wealth of options at the grocery store…strawberry applesauce, cinnamon applesauce, apple butter…the list goes on.  I was able (after a lot of label reading) to find a version from Mott’s with no sugar added, but I went through it so quickly that I found myself without any on hand and I was curious if homemade would be better.   Since I always have apples and pears on hand, I decided to give it a whirl.  To say it was delicious would be the understatement of the year.  Every bite got better and better.

I should also say that before starting Paleo, one of my favorite desserts to make was this pear syrup over vanilla ice cream.  I would just slice up a pear and cook it on the stove with a little brown sugar and cinnamon and in no time I would have a tasty topping.  This gave me the idea of trying to add a few pears to the applesauce mix.

I surfed around for a good sugar-free recipe and I stumbled across this one on Paleoparents.com.  I like it because they give you suggestions for what types of apples to use.  Unfortunately, all I had on hand were a couple of Honeycrisps and some Bosc pears, but I figured they would have to work in a pinch.

Guys, this is a hard one to mess up and you may never go back to the store bought stuff!  Now, if anybody knows if I could jar this and store it so I always have my own on hand – let me know…that is not yet my area of expertise!

This made about 3 cups – maybe a tad more.

Preheat the oven to 350 degrees F.

Here’s what I used:

  • 2 large Honeycrisp Apples, peeled, cored and cut into large chunks
  • 1 Bosc Pear, peeled, cored, and cut into large chunks
  • 1 tbsp cinnamon, approximately – I really just sprinkled it on
  • 1 tsp nutmeg, approximately
  • A 9×13 inch glass baking dish
  • tinfoil
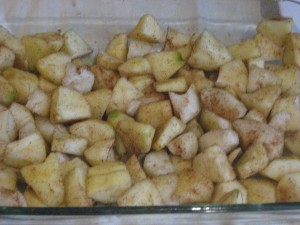
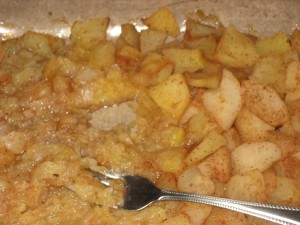
Toss the apple and pear chunks with the cinnamon and nutmeg and put in the glass baking dish.  Cover the dish with foil and cook for one hour or until soft.  Mash with a fork – you can do it as chunky or smooth as you would like it, but the whole mashing process took me about 30 seconds because the apples/pears were so soft.

Read Full Post »

This is the baked version - there is one picture of the fried version at the bottom!

It is a beautiful Friday (what Friday isn’t beautiful??) –  70 degrees F and sunny.  I have all the windows open and a cool breeze is blowing through.  It’s hard to see the glass half empty today, so I am using the postivity to propel me through a few Paleo recipes.

If you have been reading my blog, you know that I have been back and forth lately on whether I will be able to sustain the Paleo diet.  I love the way it makes me feel but oh man, I miss bread and sugar sometimes (I would love to have a lunch every now and then that is a sandwich and then follow it up with a cupcake!).  But alas, I am going to charge ahead and keep trying to stay on this path as it is very nice to not have to take blood pressure medicine anymore.

On that note, I made two separate meals today that I think will help me get through.  First, fish sticks!  I based my recipe on an Elana’s pantry recipe, because in my mind she is the Queen of Gluten Free cooking, which translates to Paleo most of the time.

I should start by pointing out that these are not your standard fish sticks.  This version didn’t come out crispy like I had hoped, but they still really hit the spot for me.  I liked them so much I made them two days in a row.

This served one as I was just making them for lunch, so you can up the recipe as needed.

Fish Sticks

  • 4 oz white fish (I use flounder, but you could use cod, tilapia, or a number of other fish!)
  • 1 egg
  • 1/4 cup almond flour
  • 1/4 cup coconut flour
  • 1 tsp chili powder
  • 1 tsp paprika
  • salt and pepper
  • If baking, 1 tbsp melted butter
  • If frying, 1/4 cup grapeseed oil (you could use half and half grapeseed/olive oil)
You can bake or fry these – if baking, preheat the oven to 450 F.  I did both methods and probably prefer baking for the ease, but the frying made them slightly crispier.  Also, line a baking sheet with tinfoil and spray with Pam.
  • If not baking, heat about 1/4 cup grapeseed oil in a pan over medium heat.  Be patient so you don’t burn the oil.
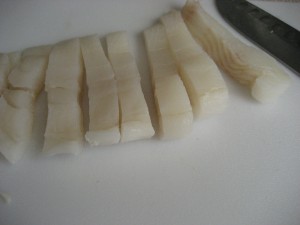
Start by whisking an egg in one bowl and stirring all the dry ingredients together on a large flat plate (you could use a bowl, but I found the plate to work nicely).  Slice the fish into strips (about an inch thick, maybe a little less).  Dip the fish into the egg to coat and then roll in the flour mixture until well coated.
If baking, place on the foil lined baking sheet, brush with a little melted butter and cook at 450 for about 15-20 minutes, flipping once to brown both sides.
If frying, once the oil is heated, place the fish sticks in the pan, leaving plenty of room to flip – don’t overcrowd, do a couple batches if necessary.  Fry on each side for about 2 minutes (I did all 4 sides).  Remove from oil and place on paper towel lined plate to absorb extra oil.

Read Full Post »

I know I have said this about a million times now, but I miss pasta.  I have been struggling lately to stay the course of gluten free Paleo eating, so every day I have been trying to com up with new recipes that will help me get through it.  One of the things that definitely includes pasta that I have missed the most is spaghetti surprisingly.  It’s hard when you don’t have pasta to find something to put the sauce over besides plain old meat.

For some, this might not be that big of a challenge, they will just throw some sauce over a slab of meat, but I like to have lots of vegetables to balance out my meat so I don’t think about what I am eating so much.  Pasta has usually held the place of that distraction but now I am turning to my dear old friend veggie to take that spot.  I have been wanting to try using zucchini or squash as a substitute lately, so today I finally gave it a shot.

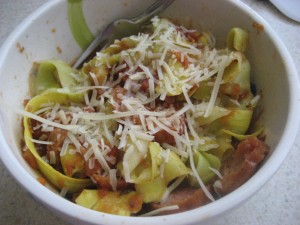
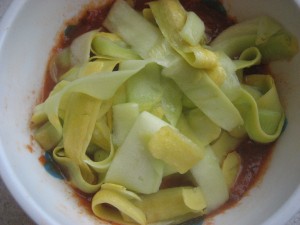
Now, let me first state that you cannot expect it to taste like pasta, let’s be clear about that.  That being said, the texture and bulk it adds to a meal was much more satisfying and tasty than I expected.  I watched a how-to video on Summer Tomato and she showed exactly how to get these beautiful “noodles”.  I used a vegetable peeler just like she did.


Serves: 1

1 yellow squash (or zucchini)

Olive Oil and Butter for sautéing

Aidell’s Andouille Sausage (or any other nitrate free meat product)

Your favorite Spaghetti Sauce (I used Chef Ricardo’s Mucho Macho – read your ingredients label carefully to ensure no sugar and other sketchy ingredients)

Start by cooking your meat (I grilled my sausage for 10 minutes on high, rotating every couple minutes) and slicing it up.  I then heated up the tomato sauce in the microwave.

To prep the “noodles”, I used a vegetable peeler and just shaved long thin slices off the squash.  Every time I shaved a slice off, I turned the squash a quarter turn.  When I got down to the seeds I stopped to the noodles wouldn’t get soggy.  I did choose to use the outside peel slices as well.

Next, heat a pan over medium high with a little olive oil and butter.  Once heated, toss in the squash and cook for no more than 2 minutes (I did about a minute and a half).  You don’t want the noodles to get soggy.

I tossed the sausage, sauce, and “noodles” together and topped with a little parmesan.  It was fantastic!


Read Full Post »

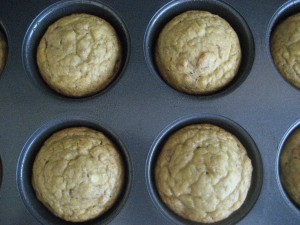
There was something missing from the first batch of muffins I made.  They were good, but a little dryer and not quite sweet enough.  They were, should I say, average muffins.  I have made about three batches since and I think I finally found the right combination, so I thought I would share.

I have to continue to credit Elana’s Pantry for the base recipe which I shift and play around with to suit my tastes.

**Since I first posted this recipe, I have been playing around with it a lot (since I make these practically every week).  I know replace all of the oil with a 1/2 cup of apple sauce (make sure it is unsweetened!).  This seemed to keep the muffins from getting too soft and wet as they sometimes do with the oil).**

Here you go:

Serves 10 muffins.

Preheat oven to 350 degrees F.

1/2 cup coconut flour

1/4 tsp salt

1/4 tsp baking soda

1 tsp cinnamon

3 eggs

1/2 cup strawberries, mashed

1/3 cup grapeseed oil

1/4 cup agave nectar

1 tbsp vanilla

1/4 cup blueberries

1/4 cup walnuts

1/4 cup pecans

Combine flour, salt, baking soda, and cinnamon in a small bowl.  In a separate bowl, blend eggs, strawberries, oil, agave, and vanilla together with a hand mixer.  With the hand mixer, add the dry ingredients to the wet and blend until smooth.

Stir in the blueberries, walnuts, and pecans.

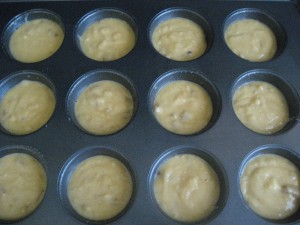
Scoop the mix into pre-greased muffin tins (I find they come out much cleaner in greased muffin tins instead of paper lined, but use whichever you prefer).

Bake for 20 minutes or until just slightly golden (keep an eye on them as they go from golden to burned quickly).  A toothpick inserted should come out clean.

Store wrapped in a paper towel in a plastic bag at room temperature (I find the fridge does funny things to the muffins – kind of dries them out).

Read Full Post »

My friend pointed out last night that it had been a long time since I posted – shout out to the LionWhisperers – which is true.  It’s been a long busy few months (work and personal) and I just haven’t found the time or motivation to post.  If you must know as well, I’ve done some damage to myself (arm injury, slamming my face into a wall) which has made me a little lazier than normal.  I think, too, I cook a lot differently these days than I used to cook so my “recipes” just don’t really seem like anything worthy of sharing.  Most nights of the week I throw a piece of cod or flounder basted in olive oil, salt, and pepper on the grill with some asparagus and cherry tomatoes on the side, which let’s admit isn’t really ground breaking cooking.

I should also admit that I don’t think writing and photography are my strong points, so I’m not 100% happy with how my blogging turns out most times (I can also be a bit overly critical of myself).  I really enjoy blogging, but not sure that my readers always get where my mind wanders due to my writing/thinking style (if I can call it a style?).

For example, as I am sitting here typing I can’t decide where to take this particular post next.  Do I talk about lunch?  Which is the one meal that is always (still) a challenge on the Paleo diet…but as I think that, I think I may need to do a lunch specific blog one of these days to get all my ideas in one place and to see if I can solicit some new ones as well.

Do I talk to you all (if there are any you’s reading) about cleaning all the carbs out of my pantry??  About the fact that I cheat every weekend on my diet??

So then I try to refocus my mind again, back to the subject at hand, my lack of exciting cooking and blogging.  So, while I say that I don’t cook like I used to I have been doing a few interesting experimentation’s with different forms of carb substitutes.

I know I’ve mentioned one of my favorite sites these days, Elana’s Pantry, quite a few times.  The recipe today is a modification, once again, from her site.  When you can’t have carbs, you really need to find some substitutions for things like bread, muffins,  and potatoes.  Elana has a lot of great ideas and most are easily modifiable.

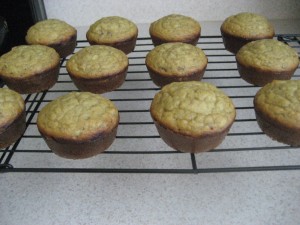
I decided to try out a recipe for muffins made with coconut flour earlier this week but Elana  made Blueberry and Cream Cupcakes and I made mine into Banana Walnut Muffins.  I also cut back a bit on the agave and oil a bit – but I can tell you from experience that her recipe is amazing as written and I may go back up on the oil and agave next time.   Either way, the muffins were tasty and satisfied my need for carbs.  I had at least two a day and here is how I made them…

Banana Walnut Muffins

Makes 12 muffins.

½ cup coconut flour, sifted

¼ teaspoon salt

¼ teaspoon baking soda

3 eggs

2 ripe bananas, mashed

1/5 cup agave nectar

1/5 cup grapeseed oil

1 tablespoon vanilla extract

1/4 cup chopped walnuts

Preheat oven to 350 degrees F.  Line or grease muffin cups.  Combine flour, salt, and baking soda in bowl.  In a separate bowl, combine the eggs, bananas, agave, oil, and vanilla extract with a hand mixer.  Mix dry ingredients into wet ingredients with hand mixer and mix until smooth.  Fold in walnuts.
Using an ice cream scoop, scoop and one scoop of batter into each muffin cup.  Bake for 20-25 minutes or until knife comes out clean.

Read Full Post »

I know, I know, I haven’t posted in a long time.  I have been trying this Paleo diet and I was beginning to think that cooking would never be fun again.  I mean – what is interesting about meat, vegetable, fruit, meat vegetable, fruit, nut…or so I thought.  I have been coming up with some pretty interesting and tasty concoctions.  I was just hesitant to post them given I am no Paleo expert and didn’t want to come across as knowing more than I really do.

But here is the thing, I like blogging and talking about my trials and tribulations with cooking so I decided to come back and start posting again.


So how is it going??  I am one month in on Paleo and feeling great!  I don’t miss my vices as much (pasta, dessert, etc…) but when my sister pointed out Elana’s Pantry I almost thought it was too good to be true…there were bread and dessert recipes galore.  My next thought was — could they really taste good???  The answer?  YES!!!

While Paleo doesn’t necessarily promote using any sugar or sugar substitutes, this recipe requires a minimal amount of agave nectar that I really felt comfortable with given the fact that it would be the only real sweet I have in a week.  I served my bread topped with chicken salad and it made a delicious lunch.

Elana’s recipe for Simple Bread is a little easier than mine because I had to make my almond meal by hand (didn’t have any almond flour handy), but the recipe was still very straight forward and only took about ten minutes to whip up.  I used a mini-loaf pan that I got at the grocery store – 5.75 in x 3 in. but Elana used a slightly larger one – just don’t go to large as this doesn’t make a huge loaf.  From comments on her site it looks like you can double the recipe and it works fine.

Ingredients

2 cups almond meal

1/2 cup flaxseed meal

1/2 teaspoon salt (I had to use kosher – all I hand on hand)

1/2 teaspoon baking soda

3 eggs

1 tablespoon agave nectar (I used raw honey as it was what I had on hand)

1/2 teaspoon apple cider vinegar

Preheat oven to 300 degrees F.

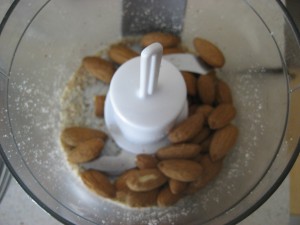
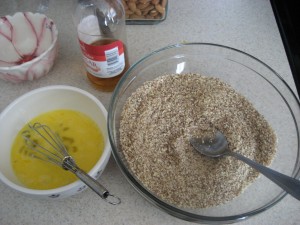
First, to make the almond meal, I grinded almonds in my food processor for about 2 minutes.  I took the almond meal and mixed it with the rest of the dry ingredients (flaxseed meal, salt, baking soda).

I then whisked 3 eggs in a separate bowl and added in the rest of the wet ingredients (honey/agave, apple cider vinegar).

Mix together the wet and dry ingredients.  Pour the mixture into your loaf pan and bake for 45-55 minutes or until a knife in the center comes out clean.

Refrigerate to store.

Read Full Post »